Table of Contents
If you’re looking for a creative way to teach shapes this October, you’re going to love this simple Jack-o’-Lantern Halloween craft! It’s perfect for young learners, whether you’re in a classroom setting or at home with your little ones.
In the early months of school, many children are still working on developing fine motor skills and basic shape recognition. This activity provides a fun, seasonal twist that makes learning both hands-on and memorable. Plus, it’s super flexible—great for a range of skill levels!
Whether your children are just starting to recognize shapes or ready for more advanced exploration, this activity can be easily adapted. Depending on your learners’ skill levels, you can choose to include or exclude the cutting portion.
✂️ Why Crafts Matter in Early Childhood Learning
Crafts help children:
- Strengthen fine motor skills through cutting, gluing, and coloring
- Practice following directions and completing multi-step tasks
- Develop creativity and confidence by making something unique
- Reinforce academic concepts (like shapes, colors, and patterns) in an engaging way
🧡 A Few Ways to Use This Halloween Craft
You can tailor this activity to fit the needs of your classroom or home learning environment. Below are a few creative twists that help you focus on specific learning goals.
✂️ Jack-o’-Lantern with Shapes – Activity Ideas
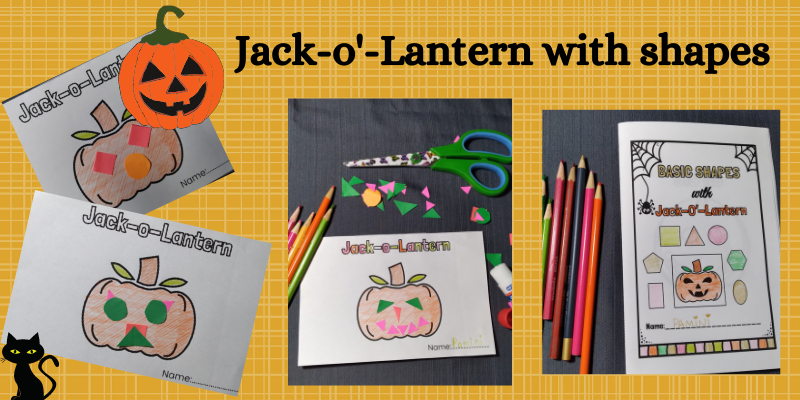
🟠 1. Jack-o-Lantern with One Shape
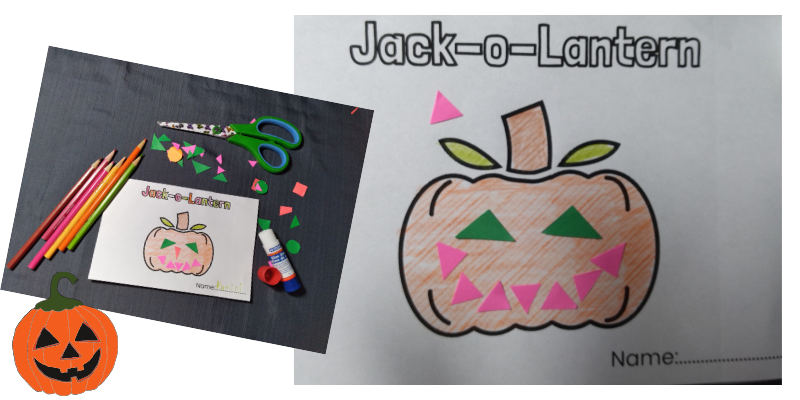
Sometimes, keeping things simple is the most effective approach—especially with preschoolers or early kindergarteners. Choose one basic shape, like a triangle, and provide your children with a variety of triangle pieces in different sizes, colors, or textures (felt, paper, foam, etc.).
Let them create Jack-o’-Lantern faces using only that shape for the eyes, nose, and mouth. It’s always fun to see how imaginative kids can be with one “limitation.” You’ll often hear things like:
“Mine looks silly because it has triangle teeth!”
“I made a scared pumpkin—he has upside-down triangles!”
Even though they might not know terms like “isosceles” or “scalene,” they’ll start noticing visual differences, which is a great foundation for later geometry learning.
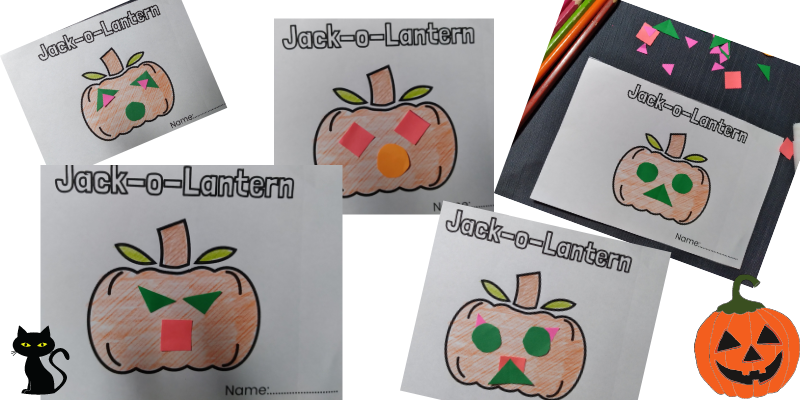
🟣 2. Use a Few Shapes – Controlled Introduction
This is perfect for children who are ready to explore more than one shape at a time. In the Montessori method, we often use the Three-Period Lesson, introducing three new words at once. (Read, The Best Strategy to Teach New Words – Montessori Method).
Pick three contrasting shapes—say, a circle, square, and triangle—and invite your child to design a Jack-o’-Lantern using only those shapes. You could even create a sorting tray or mat where children organize the shapes before crafting.
This version of the activity not only helps kids compare and contrast but also supports vocabulary development as they describe what they’re doing.
“I gave my pumpkin square eyes and a triangle nose!”
Want to make it even more interactive? Add a shape hunt first! Hide foam or paper shapes around the room and let children find them before they start their pumpkin designs.
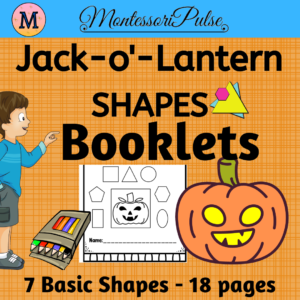
🧡 3. Jack-o’-Lantern Shapes Booklet – A Keepsake Coloring Book
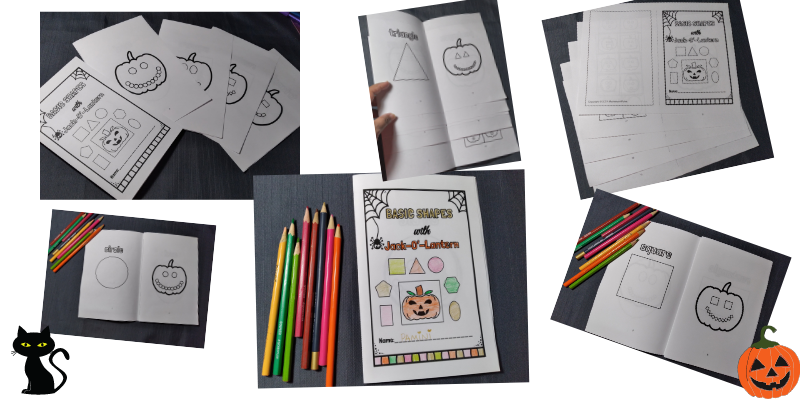
You know how children love to take their work home and show it off? This idea takes the craft to the next level: a mini shapes booklet starring Halloween pumpkins!
Create a simple booklet with one Jack-o’-Lantern outline per page. Label each page with a different shape and let the children add the corresponding shape pieces to create a face. The shapes could be:
- Circle
- Square
- Triangle
- Rectangle
- Pentagon
- Hexagon
- Oval
You can print shape outlines on sticker paper or cut out shapes in advance for younger children to glue. Once completed, this booklet becomes a beautiful keepsake—and a great conversation starter at home. Parents will love hearing their child proudly explain, “This is my hexagon pumpkin!”
🧠 Classroom Tips for Success
Here are a few quick tips to make this craft session run smoothly:
- Pre-cut shapes for younger learners who are still developing scissor skills.
- Use glue sticks or pre-cut sticky foam shapes to avoid messy spills.
- Offer templates or stencils for children who need a little more guidance.
- Pair the activity with a book, like The Legend of Spookley the Square Pumpkin, to connect literacy and math.
- Create a bulletin board display with everyone’s pumpkin faces—label the shapes used for a visual reference wall!
🏡 Homeschooling? Here’s How to Make It Extra Special
If you’re doing this activity at home, turn it into a mini-unit study! Here are some ideas:
- Math Connection: Count how many of each shape are used. Make a simple bar graph together.
- Language Arts: Have your child name their pumpkin and write (or dictate) a short story about it.
- Art Extension: Use tissue paper or watercolors to create a glowing pumpkin look.
This helps extend a single craft into a multi-day project that integrates different areas of learning—without feeling overwhelming.